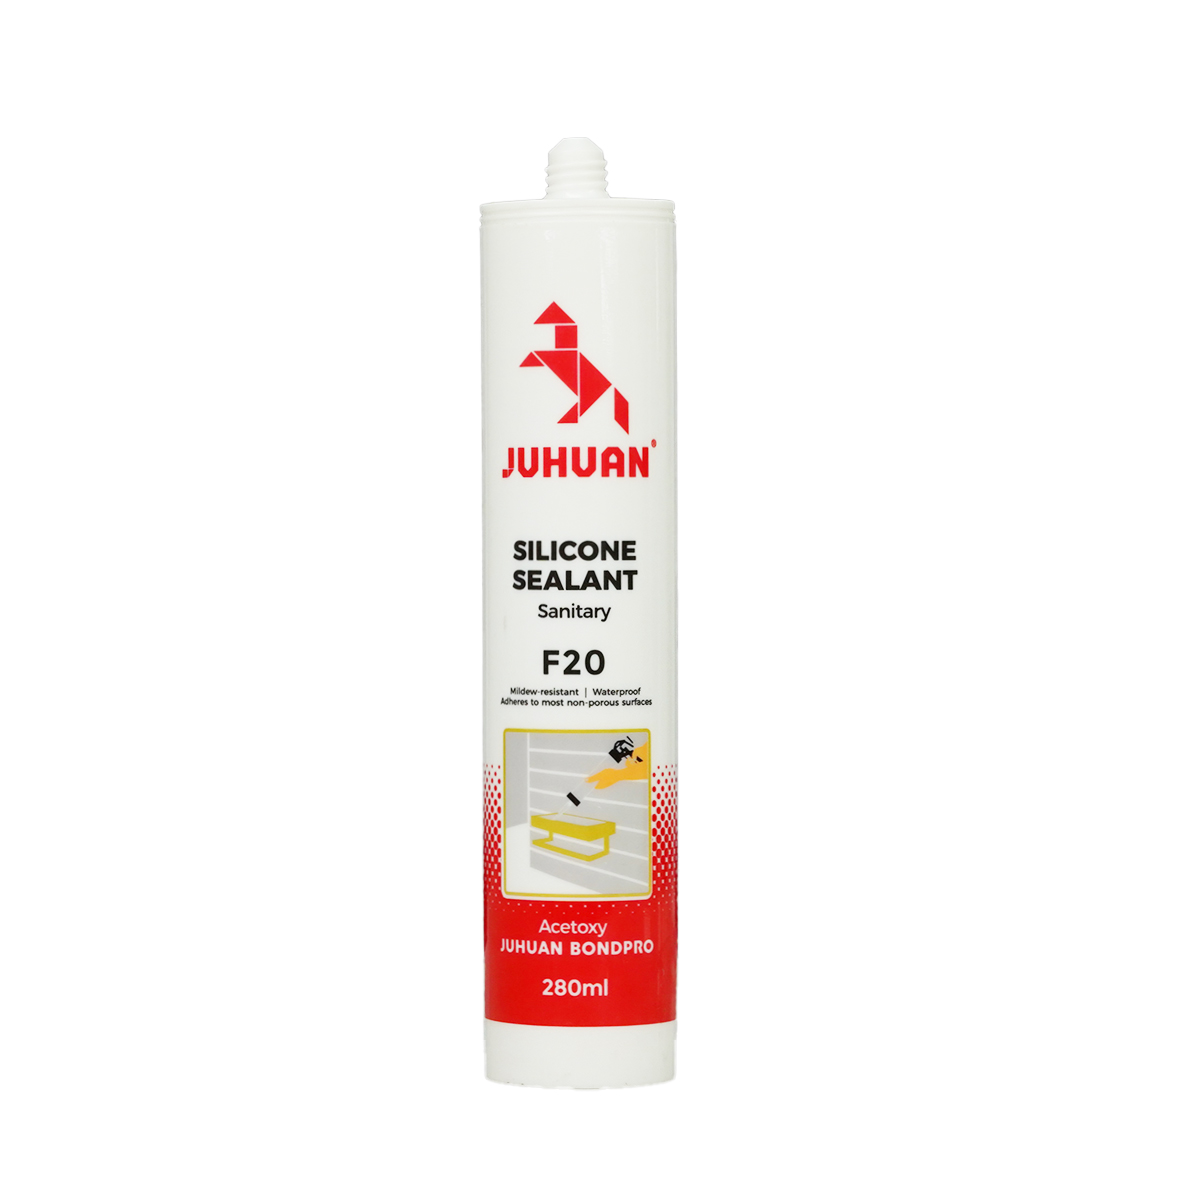
Why Silicone Sealant Is a Must-Have for Bathrooms
Let’s be real—bathrooms are total moisture magnets. Between hot showers steaming up the space and water splashing on counters and around tubs, if you don’t seal things up right, you’re asking for trouble like mold growth or water damage. That’s where silicone sealant comes in. It’s like a tiny, tough shield that keeps water from seeping into gaps around sinks, tubs, shower doors, or toilet bases. Unlike some other sealants that crack easily when they get wet or warm, good silicone sealant stays flexible, sticks tight to most bathroom surfaces (think ceramic, glass, or metal), and fights off mold too. Trust me, skipping this step or using the wrong product will only lead to headaches later—like having to tear out moldy caulk and start over.
Prep Work: Get Your Bathroom Ready Before Applying
You can’t just grab the silicone sealant and start squeezing—it won’t stick if the surface is dirty or wet. First, clear the area: move toiletries off the counter, take down any shower curtains that might get in the way, and make sure the bathroom is well-ventilated (open a window or turn on the fan—fumes from sealant can be strong). Next, clean the gaps you’re going to seal. If there’s old caulk or sealant there, scrape it off with a putty knife—don’t leave any bits behind, because they’ll stop the new silicone from adhering. Then, wipe the area with a damp cloth to get rid of dust, soap scum, or grime. After that, dry it completely—even a little moisture can mess up how well the sealant sticks. Some people use rubbing alcohol to wipe the surface one last time to make sure it’s super clean, and that’s not a bad idea either. Take your time here—prep is half the battle.
Picking the Right Silicone Sealant for Your Bathroom
Not all silicone sealants are created equal, especially for bathrooms. You need one that’s made for wet areas—look for labels like “bathroom,” “waterproof,” or “mold-resistant.” Neutral cure silicone is usually a good bet because it doesn’t give off a strong vinegar smell (unlike acidic silicone, which can corrode some metals or stain stone). Also, think about the color: white or clear are the most common for bathrooms. Clear works if you want the sealant to blend in with glass or light-colored tiles, while white is great for matching most fixtures. Don’t skimp on quality here—cheaper sealants might dry out and crack faster, meaning you’ll have to redo the job sooner. A good bathroom silicone sealant should last for years, so it’s worth spending a little extra to get something reliable.
Step-by-Step: Applying Silicone Sealant Like a Pro
First, cut the tip of the silicone sealant tube at a 45-degree angle—this helps the sealant flow smoothly into gaps. The size of the opening depends on how big the gap is: smaller gaps need a smaller opening, bigger gaps need a little more space. If your tube comes with a nozzle, attach it tightly. Then, load the tube into a caulking gun—it makes squeezing the sealant steady and easy (trying to do it by hand is a recipe for uneven lines). Hold the caulking gun at a slight angle, right above the gap, and squeeze gently but firmly as you move along the gap. Go slow—if you rush, you’ll end up with too much sealant in some spots and not enough in others. Try to make a continuous, even line. Once you’ve covered the gap, wet your finger slightly (this keeps the sealant from sticking to you) and run it along the line to smooth it out. This helps the sealant fit into the gap better and looks neater. Wipe off any excess sealant with a damp cloth right away—once it dries, it’s hard to remove.
Letting the Silicone Sealant Dry: Do’s and Don’ts
After applying the sealant, you need to let it dry (also called curing) properly—this is when it gets tough and waterproof. Check the tube for drying time, but most bathroom silicone sealants take 24 hours to fully cure. Don’t touch or disturb the sealant while it’s drying—even a little bump can mess up the line. Also, keep the bathroom well-ventilated during this time to help the sealant dry faster and let fumes escape. Don’t use the sink, tub, or shower until the sealant is fully cured—water will wash away wet sealant or keep it from drying right. I’ve made the mistake of using the shower too soon before, and had to redo the whole thing—total waste of time. Be patient here; waiting a day is way better than having to fix a bad seal later.
Tips to Make Your Silicone Sealant Last Longer
Once your silicone sealant is dry and done, you want it to stay in good shape for as long as possible. First, keep the area clean—wipe down the sealant with a mild cleaner (avoid harsh chemicals that can break it down) when you clean the bathroom. Don’t use sharp tools near the sealant—scraping it with a razor or knife will cut or crack it. If you notice small cracks or gaps in the sealant later, fix them right away with a little extra sealant—small problems turn into big ones fast if you ignore them. Also, check the sealant every few months, especially around areas that get a lot of water (like the shower door or tub edge). If you see mold starting to grow on the sealant, clean it with a mold remover—don’t just leave it, because mold can spread under the sealant and cause damage. With a little care, your silicone sealant should keep your bathroom dry and mold-free for years.

 Hot News